

How to thread a commercial sewing machine
1. Spread the sponge pad: the sponge pad can help absorb the engine oil and dirt generated during daily use, or broken wires. Please align the holes before placing it to avoid damage to the sponge pad during placement. And it is necessary to replace the sponge pad regularly.
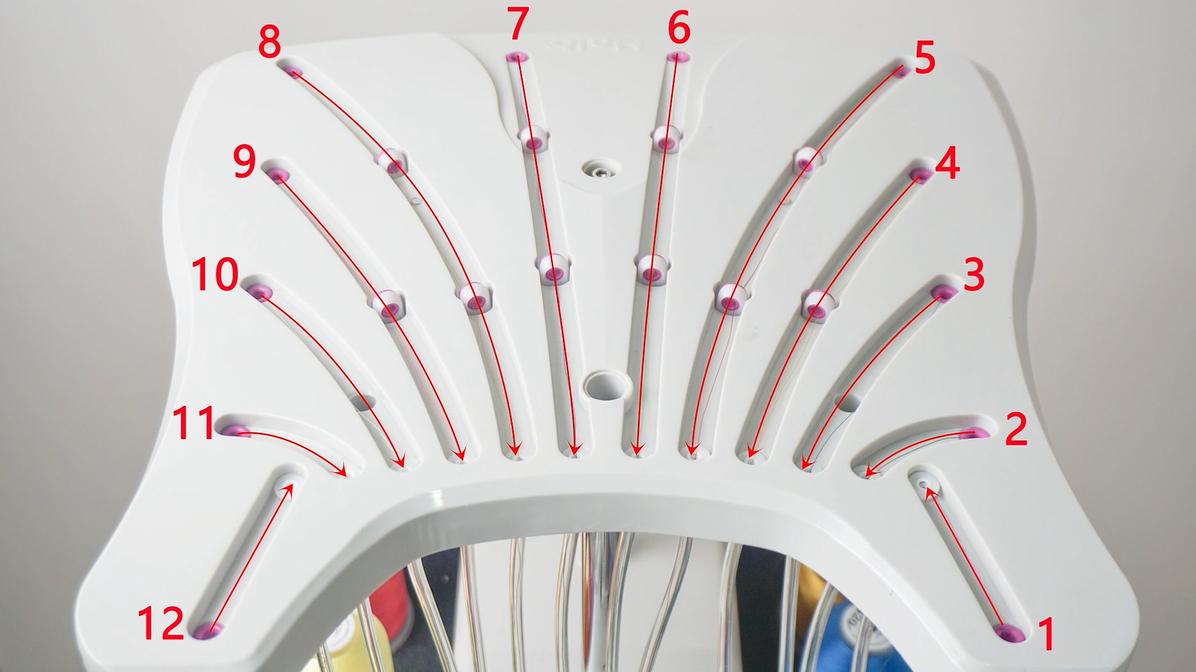
2. Insert plastic supports: S1201 needs to place 12 pipelines, it has 12 corresponding plastic supports, and S1501 also has 15. The plastic support is used to place the spool, which can ensure that the spool reduces vibration during the operation of the machine.

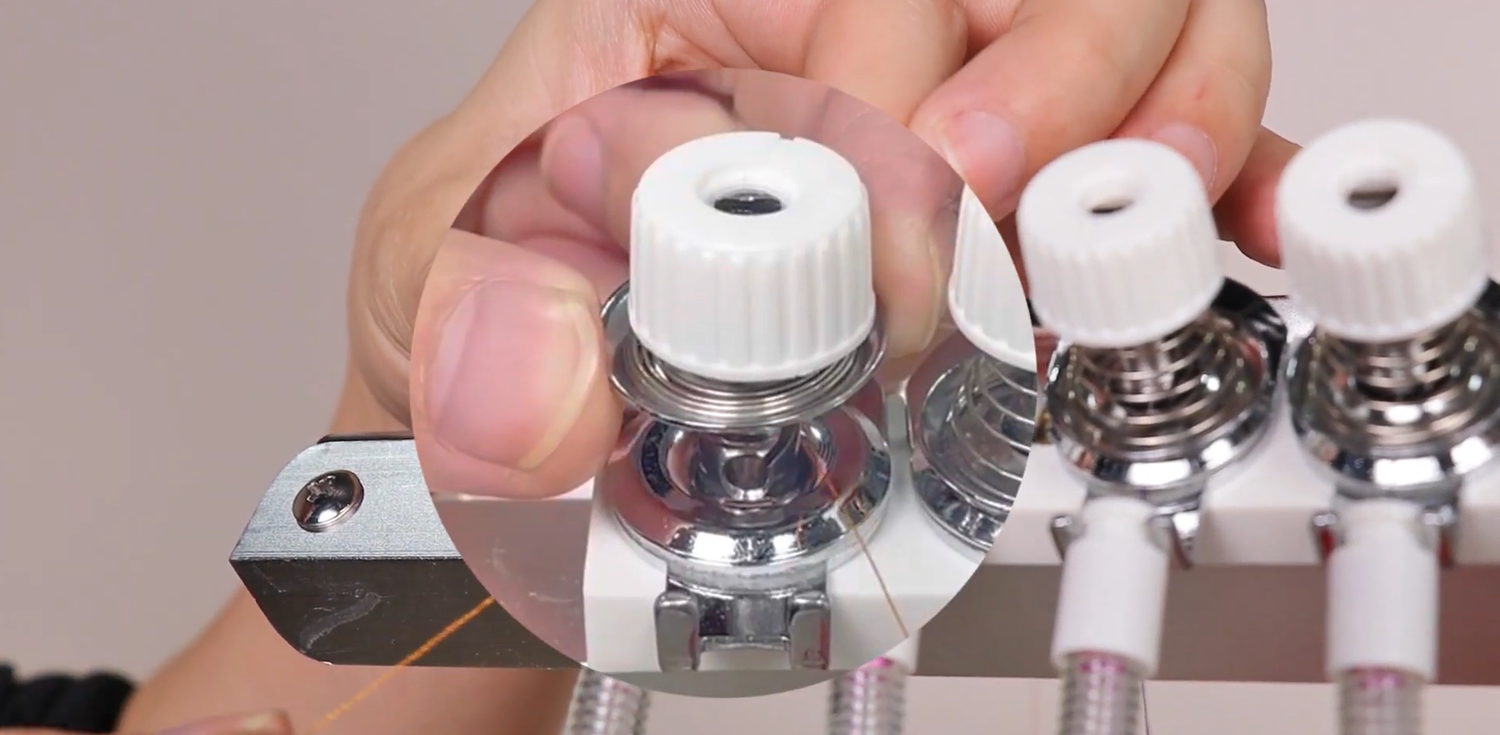
3. Unwind the spool: place the spool of the corresponding color of your embroidery on the vertical spool spool on the top of the machine, and then we can start threading.
4. Lift the presser foot: Before you start threading, please make sure the presser foot is raised. This releases tension on the thread and makes threading easier.
5. Upper thread guide: First thread the thread through the upper thread guide, which is the small metal ring near the spool shaft. S1201 has 12 corresponding wire holes, and S1501 also has 15. Please go through them in order, 1-1, 2-2. If you disturb the order, it will definitely affect the normal use of the sewing machine.
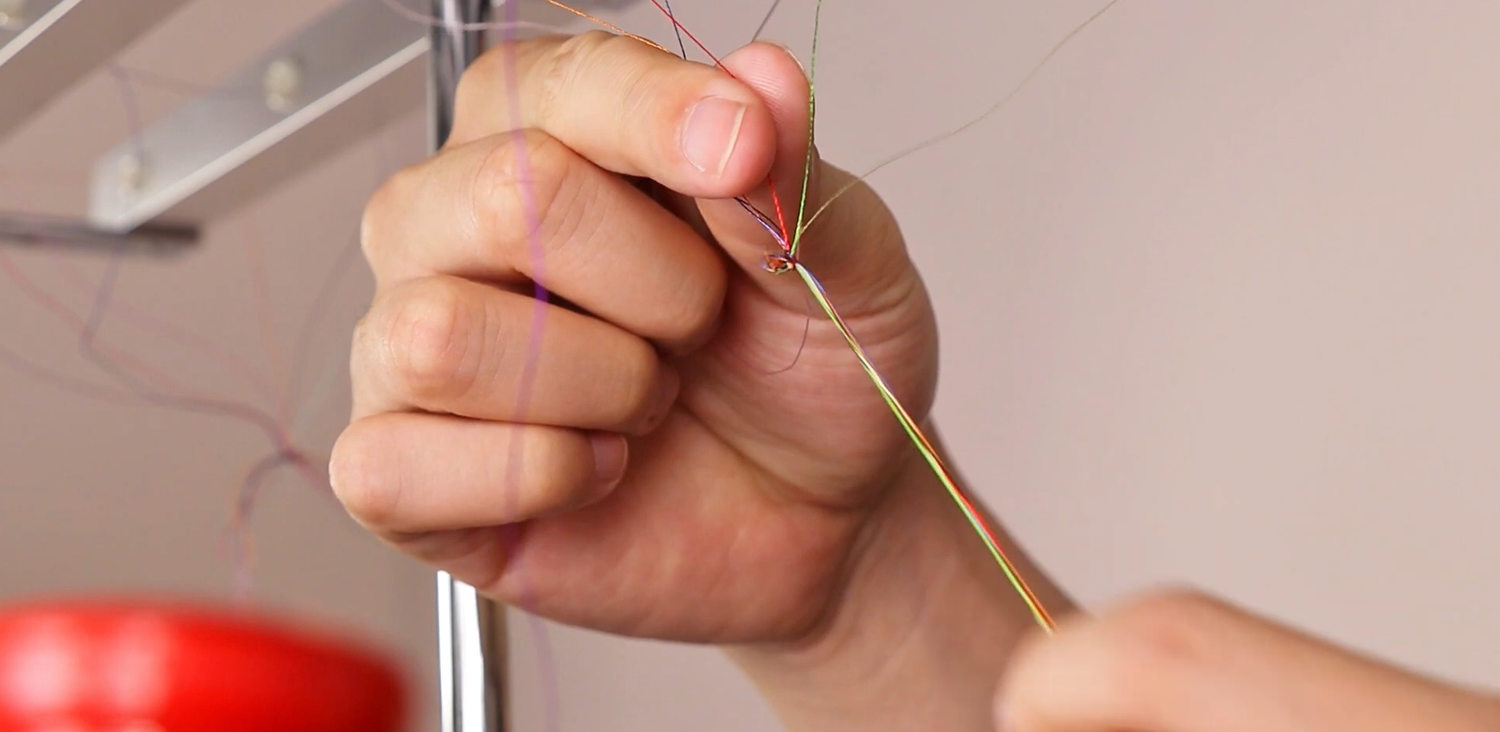
6. Plastic guide rail: It takes patience and training to pass the wire through the plastic guide rail. It is impossible to pass it by hand alone, and we need to use the iron wire we put in the toolbox. Wrap the wire around the wire and run the wire through the entire length of the plastic rail.
7. Threaded guide rail: follow the numbered threaded guide rail on the machine.
8. Tension disc: Put the thread down and around the tension disc. These discs help control the tension of the thread. The mechanism on the upper part of the tension disc needs to be pulled apart and the thread clipped in to completely fix the thread. If you don't pay attention, it will also cause the line to shift.
9.Thread take-up lever: Pass the thread through the thread take-up lever. A thread take-up is a moving rod or hook that moves up and down while sewing.
10. Thread guide and needle bar: Pass the thread through the thread guide on the machine. Thread the needle from front to back, making sure to go through the eye of the needle from left to right.
11. Pull up the bobbin thread: pull the bobbin thread gently until the loop of the bottom thread passes through the needle plate.
12. Thread tension: Gently hold the upper and lower threads behind the presser foot with your left hand. Start sewing slowly, and watch to make sure the stitches are forming correctly. If needed, adjust the tension setting to achieve a balanced stitch (neither too loose nor too tight).
13. Start sewing: Once everything is threaded and the tension is set, you can start sewing by guiding the fabric through the machine.